How to Choose a Shower Enclosure: Glass, Frame and Finish Options Compared

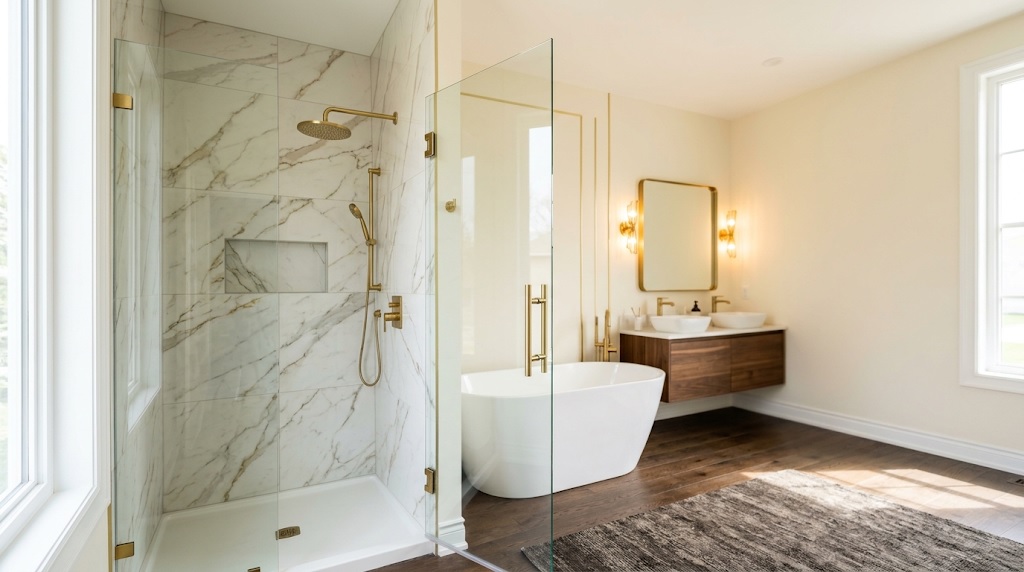
How to choose a shower enclosure ranks among the most consequential decisions in a bathroom renovation. The enclosure defines the visual character of the room, controls water containment, and influences daily cleaning effort for years. A poorly matched enclosure leaks, accumulates grime in joints that resist scrubbing, and clashes with surrounding fixtures. A well-chosen unit integrates with the room architecture, contains spray reliably, and maintains its appearance through thousands of uses.
Three core variables drive the selection process: the glass panel type, the framing configuration, and the metal hardware finish. Each carries independent performance and aesthetic implications, and the interaction between them determines whether the final installation looks intentional or compromised. Understanding the options before ordering prevents costly mid-project changes and ensures the enclosure suits the space physically and visually.
Glass Panel Types and Thickness Considerations
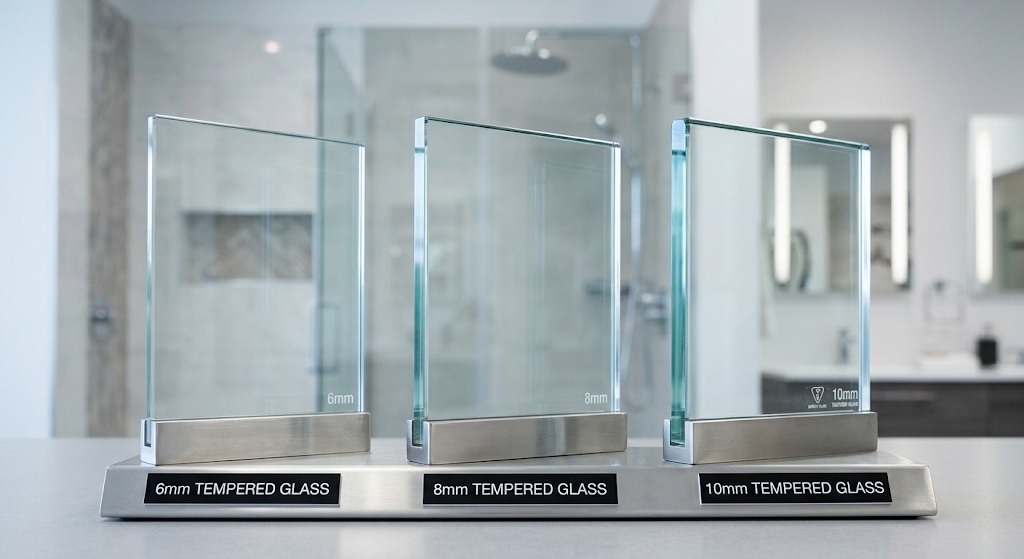
The glass panels form the primary visible and functional element of any shower enclosure. Standard residential shower glass comes in three thickness options: six millimeter, eight millimeter, and ten millimeter. Six-millimeter glass suits smaller pivot-door enclosures and framed units where the metal frame provides structural rigidity. Eight-millimeter glass represents the industry standard for frameless and semi-frameless hinged doors, balancing weight and rigidity at a moderate price point. Ten-millimeter glass delivers a premium feel with minimal flex, ideal for wide doors spanning thirty-six inches or more.
All shower glass should be tempered safety glass, which shatters into small granular fragments rather than sharp shards upon impact. Look for certification marks indicating compliance with ANSI Z97.1 or EN 12150 standards. Tempering is not an upgrade option—it is a mandatory safety requirement for any glass used in shower applications.
Low-iron glass, sometimes marketed as ultra-clear or starfire glass, removes the faint green tint present in standard float glass.
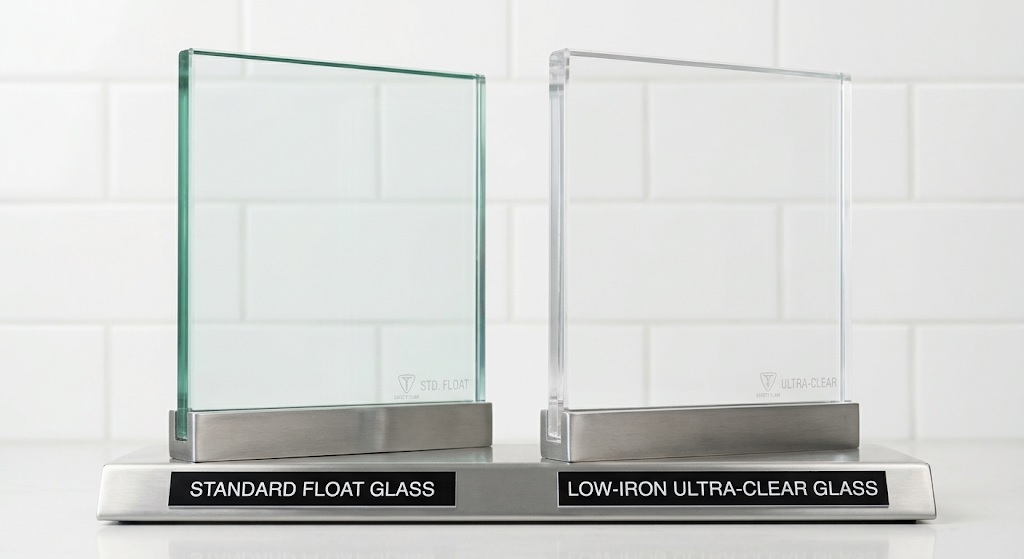
The green cast becomes particularly visible along polished edges and at thicker glass specifications. If your bathroom design features white or light-colored tile, or if you want the cleanest possible view of decorative tile work inside the shower, low-iron glass prevents the greenish distortion that standard glass introduces.
Glass Surface Treatments and Coatings
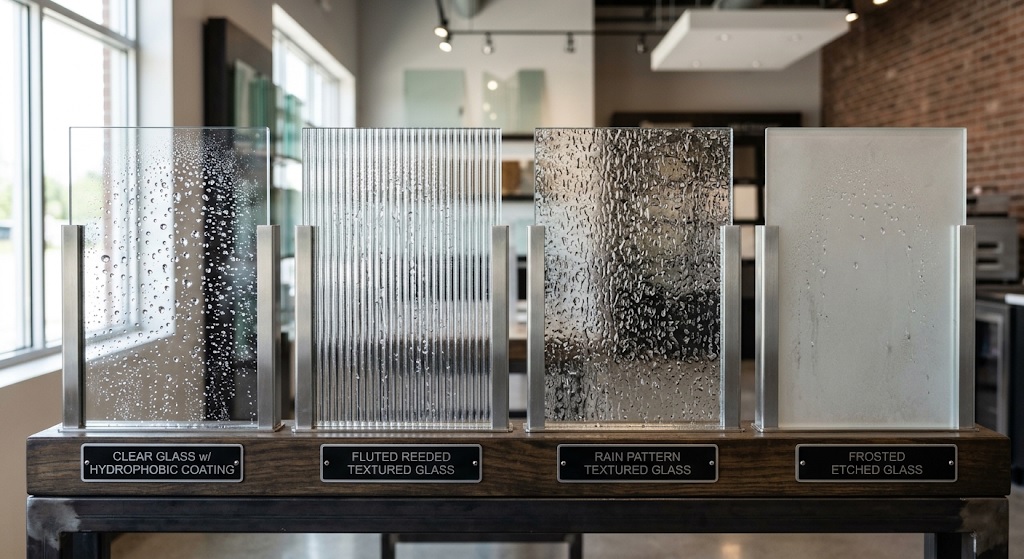
Beyond the glass itself, surface treatments affect maintenance effort significantly. Clear glass requires squeegeeing after every shower to prevent hard water spotting and soap scum buildup. Manufacturers offer factory-applied hydrophobic coatings that cause water to bead and sheet off rather than drying in place. These coatings reduce cleaning frequency and keep the glass looking newer between deep cleanings, though they add cost and eventually wear off after several years of regular use.
Patterned glass options—including fluted, reeded, and rain glass—provide varying degrees of privacy while diffusing the view of the shower interior. These textures work well for enclosures visible from bedroom areas or for shared family bathrooms where privacy during simultaneous use matters. Textured glass is harder to squeegee flat and tends to hold soap residue in the grooves, requiring more deliberate cleaning technique.
Frosted or etched glass offers full privacy and a softer ambient appearance. The etched surface scatters light rather than transmitting clear images, making it suitable for bathrooms where the shower faces a window or entry. Frosted glass shows water spots less prominently than clear glass but still requires regular cleaning to prevent mineral buildup that eventually etches the surface permanently.
Framing Configurations and Structural Implications
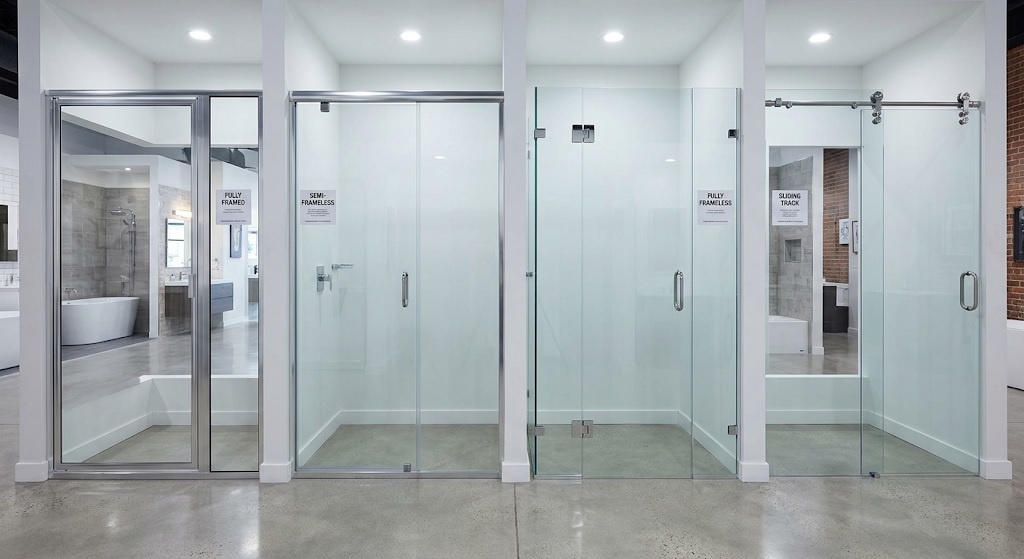
The framing system determines both the structural approach and the visual weight of the enclosure. Four primary configurations dominate the market, each suited to different bathroom layouts and budgets.
Framed enclosures use full metal framing around every glass edge. The frame provides structural support, allowing thinner glass and simpler hardware. Framed units cost less, install faster, and offer excellent water containment because the frame channels direct water back into the basin. The tradeoff is visual heaviness—metal frames create visible lines that segment the glass and collect grime in their tracks over time.
Semi-frameless enclosures eliminate some framing while retaining structural metal where needed for support. A common configuration uses a frameless hinged door with a framed side panel, or a metal header across the top with frameless vertical edges. Semi-frameless designs reduce visual clutter while keeping costs below fully frameless alternatives. They work well when the structural support wall cannot accept the heavy-duty hinges required for full frameless doors.
Frameless enclosures use minimal hardware—typically just hinges, a handle, and a bottom seal strip. The glass panels bear their own structural load and require precise fabrication with tight tolerances. Frameless installations demand sturdy backing walls—either solid masonry or wood framing reinforced with blocking—to support the concentrated loads at hinge attachment points. The result is a clean, open appearance that maximizes visible tile work and natural light transfer.
Sliding enclosures bypass the swing-radius problem entirely, making them the standard choice for compact bathrooms where a hinged door would collide with fixtures or traffic flow. Sliding doors run on overhead or floor-mounted tracks and require periodic track cleaning and roller adjustment to maintain smooth operation. The track gathers soap residue and hair, requiring more cleaning attention than hinged configurations.
Metal Finish Selection and Hardware Coordination
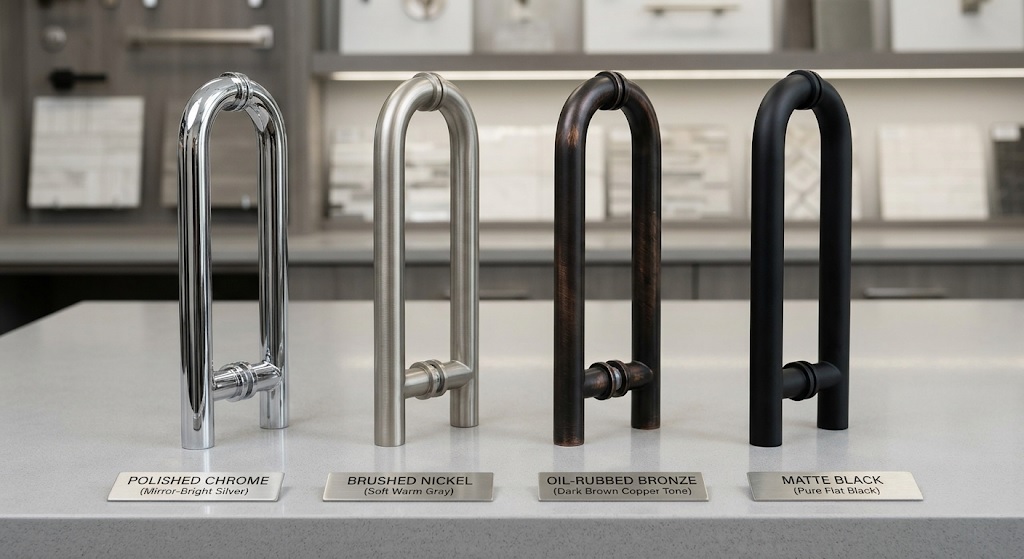
The finish on hinges, handles, tracks, and trim ties the enclosure into the broader bathroom hardware palette. Matching the shower hardware finish to faucets, towel bars, and cabinet pulls creates a cohesive design statement, while mixing finishes intentionally can produce a layered, curated look.
Polished chrome remains the most common and most affordable finish. Its mirror-like surface resists corrosion indefinitely and pairs with virtually any color scheme. Chrome shows water spots and fingerprints prominently, requiring frequent wiping to maintain its shine.
Brushed nickel softens the reflective quality while adding a warm undertone that flatters both cool and warm tile colors. Brushed surfaces hide water spots and minor scratches far better than polished finishes, making them a practical choice for busy households. Brushed nickel commands a moderate price premium over chrome.
Oil-rubbed bronze and matte black finishes suit traditional and contemporary designs respectively. Both finishes are achieved through physical vapor deposition coatings rather than plating, which affects their long-term durability. High-quality PVD finishes resist scratching and tarnishing for decades, but lower-grade coatings can chip or fade with abrasive cleaning. Verify the manufacturer warranty covers finish integrity before selecting darker coated finishes.
For the highest corrosion resistance in steamy bathroom environments, look for finishes with PVD certification. The PVD process bonds the finish material at the molecular level to the base metal, creating a surface that withstands humidity, cleaning chemicals, and physical wear without degradation. PVD finishes carry a higher upfront cost but maintain their appearance longer than electroplated alternatives.
Measuring and Configuration Planning
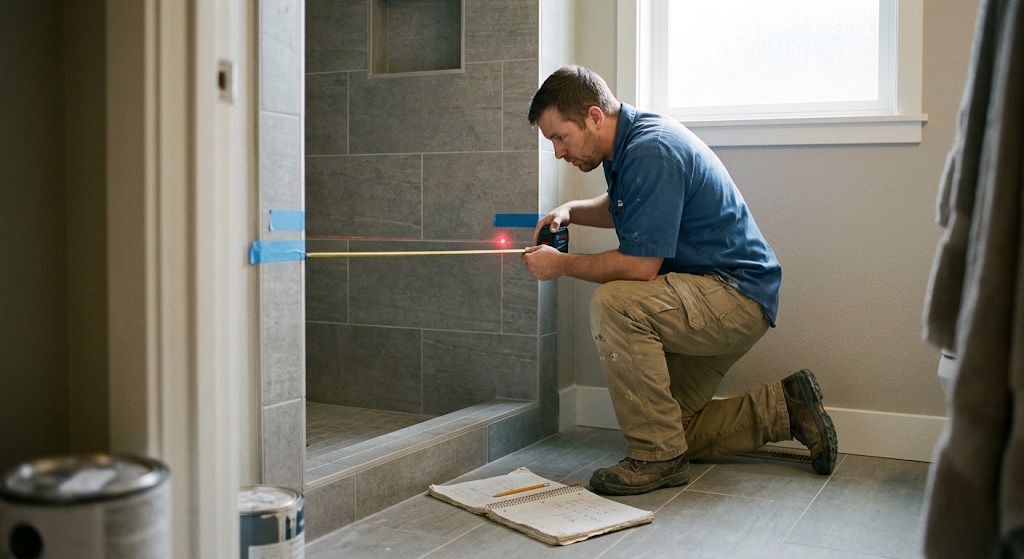
Accurate measurements prevent the most common enclosure ordering errors. Measure the opening width at the top, middle, and bottom of the installation area—walls are rarely perfectly plumb, and the narrowest dimension determines the maximum glass width. For hinged doors, verify that the swing arc clears fixtures, vanity corners, and doorways. Building codes typically require a minimum twenty-two-inch clear opening for shower doors, though wider openings of twenty-eight inches or more improve accessibility.
For neo-angle and corner enclosures, measure both walls from the corner to the planned glass edge and confirm the diagonal measurement across the opening. Custom-cut glass accommodates out-of-square conditions, but standard stock sizes assume square corners and level curbs. If the shower curb slopes more than one-eighth inch across its width, the door seal will gap at the low side and leak.
Consider the sill height when selecting door swing direction. A low curb under two inches offers easy entry but provides minimal water damming capacity. Higher curbs of four to six inches contain splash better but create a tripping hazard for users with mobility limitations. Coordinate the curb height with the door sweep seal to ensure continuous contact along the full width.
Installation Approach and Professional Requirements
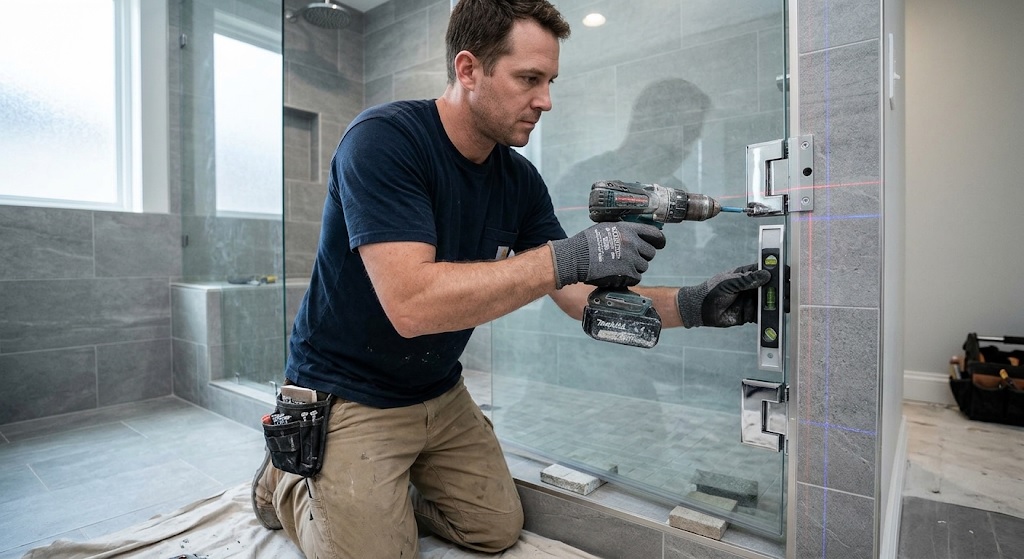
Frameless and heavy semi-frameless enclosures require professional installation. The glass panels weigh between forty and one hundred twenty pounds depending on size and thickness, and the hinges must be set to within a fraction of a degree of level to prevent the door from drifting open or closed under its own weight. A misaligned hinge causes the door to bind against the side panel, stressing the glass at the mounting holes and creating stress fractures that can propagate over time.
Framed and sliding enclosures are more forgiving for experienced do-it-yourself installers, provided the existing walls are plumb and the curb is level. The manufacturer template guides track placement and hinge positioning. Allocate a full day for a standard framed unit and two days for a frameless installation, accounting for curing time of any sealant used at the curb and wall joints.
Regardless of who installs the enclosure, apply a continuous bead of mildew-resistant silicone sealant along all wall-to-glass joints and along the curb-to-glass interface. The sealant bridges the small gap between the glass and the tile surface, preventing water from migrating behind the enclosure framing into the wall cavity. Inspect this sealant annually and reapply where shrinkage or discoloration appears.
Matching the Enclosure to Your Bathroom
The final selection balances structural practicality with design intent. Small bathrooms benefit from sliding or frameless units that minimize visual mass and swing clearance requirements. Large master baths can support heavy glass frameless enclosures with premium finishes that serve as architectural focal points. Mid-range bathrooms often find the best balance with semi-frameless units that deliver a refined look at accessible pricing.
Coordinate the glass type with the interior tile. Dark or busy tile patterns pair well with clear glass that showcases the design. Light, minimalist tile works equally with clear, textured, or frosted glass depending on the privacy needs of the space. Ensure the hardware finish harmonizes with other metal surfaces in the room—this single detail often distinguishes a professionally designed bathroom from an assembled collection of fixtures.
Taking time to evaluate glass type, framing approach, finish quality, and dimensional accuracy before ordering produces an enclosure that performs reliably and complements the room for the full service life of the installation.